

Making Edible Cookie Dough is seriously so simple to do! It only takes a handful of ingredients and about 10 minutes of your time. The hardest part is waiting for the dough to chill so you can get that perfectly dense bite every time. What’s not to love?! Follow my easy Edible Cookie Dough recipe below and indulge that sweet tooth of yours!
This post contains affiliate links which means that I may earn a small commission when you purchase through my links. There is no extra cost to you!
Equipment needed for this Edible Cookie Dough Recipe
- Stand mixer with paddle attachment OR mixing bowl and wooden spoon
- Cookie scoop (any size, but I use a tablespoon sized scoop)
- Baking sheet (to freeze cookie dough bites)
- Parchment or wax paper

Ingredients for making Edible Cookie Dough
- Unsalted Butter at room temperature
- Brown Sugar
- Vanilla Extract
- Salt
- Flour *heat treated* (all purpose or unbleached)
- Milk (any milk will do, I use Oat Milk)
- Chocolate Chips (any kind you like! I personally love semisweet)
Instructions on how to make this easy Edible Cookie Dough
1. First, cream together the room temperature butter and sugar until light and fluffy.


2. Next, add the vanilla and salt and mix well.

3. Next, add the flour and beat until well combined. *Heat treated flour is recommended in this recipe (since raw flour can contain germs that could cause food borne illnesses) which can be done at home if your store bought flour has not already been heat treated. It can also be done ahead of time and stored in your pantry so it’s ready to use whenever!* See directions at the bottom of this post on how to heat treat flour.

4. Once combined, it should look thick and a bit crumbly like the photo below.

5. Now add the milk and mix again.

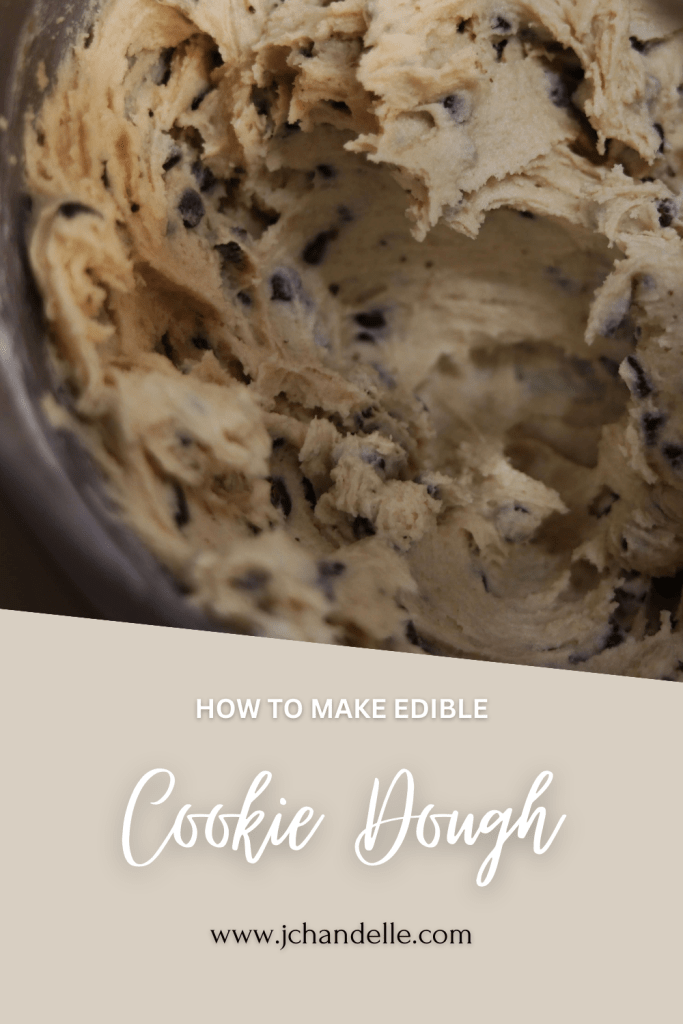
6. Once the milk is mixed in, add your choice of chocolate chips and mix until they’re well incorporated.

7. The finished cookie dough should look like the photo below.

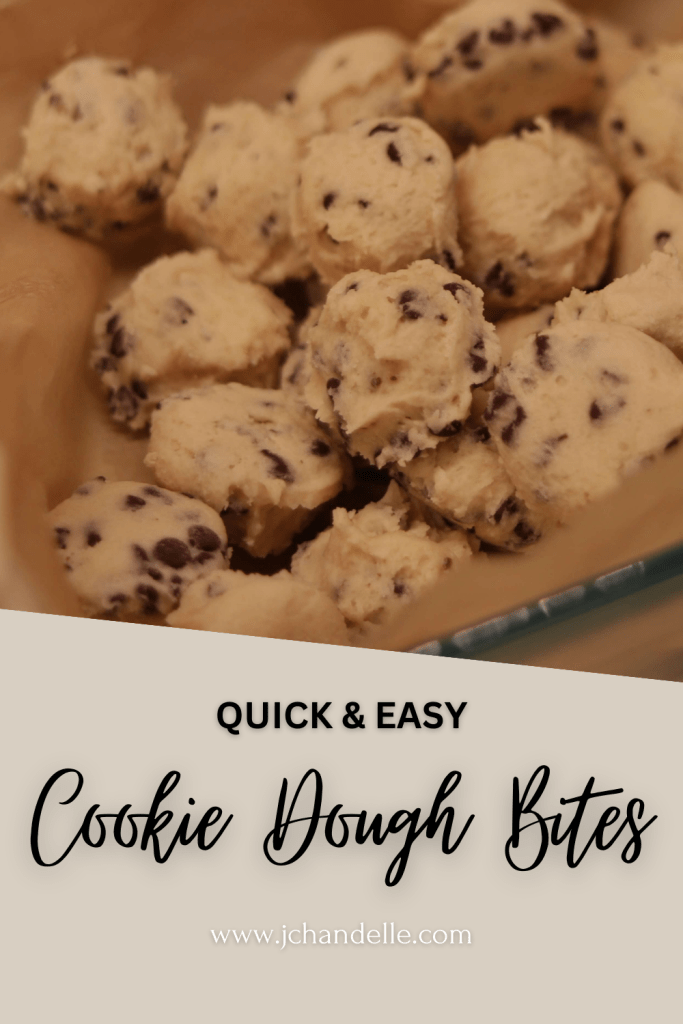
8. Now you could absolutely just go at this with a spoon (which is often what my husband and children do 😄) but I personally prefer to use a small sized cookie scoop and scoop the cookie dough onto a parchment paper lined baking sheet.

9. I then place that baking sheet into the freezer for 10-20 minutes. Just enough time for them to harden a bit before putting them into a parchment paper lined container. This just helps the cookie dough balls to not stick to one another.

Why should you heat treat flour?
The simple answer, to kill any germs that could potentially cause a food borne illness. But don’t just take my word for it! As stated by the CDC,
“Flour doesn’t look like a raw food, but most flour is raw. That means it hasn’t been treated to kill germs that cause food poisoning, such as Escherichia coli (E. coli) and Salmonella. These harmful germs can contaminate grain while it’s still in the field or flour while it’s being made. Steps like grinding grain and bleaching flour don’t kill harmful germs—and these germs can end up in flour or baking mixes you buy at the store. You can get sick if you eat unbaked dough or batter made with flour containing germs. Germs are killed only when flour is baked or cooked.”
If you want to read the full article for yourself, you can find it here. It’s a quick read, but enlightening for sure!
How to heat treat flour at home
In the oven: Preheat your oven to 350◦F, line a baking sheet with parchment paper, lay no more than 2 cups of flour on the baking sheet in a thin layer and bake for approximately 5 minutes. Or until the temperature of the flour reaches 160◦F.
In the microwave: Place the flour in a microwave safe bowl and cook on high heat for 1 minute.
Common Questions
Does edible cookie dough actually taste like cookie dough?
In my opinion, yes! I can’t really tell a difference between this edible cookie dough and the cookie dough I make for baked cookies. That’s why I’m sharing this recipe! It took some trial and error to find the right balance of ingredients to achieve an edible cookie dough that tasted like the real thing, but was safe to eat!
Is edible cookie dough actually edible?
YES! However, as stated above, the flour should be heat treated and cooled beforehand. And like this recipe, not include any egg.
Other uses for Edible Cookie Dough
1. Roll into little balls and add to ice cream.
2. Make cookie dough truffles.
3. Make cookie dough cups. (my personal favorite!) Think of a peanut butter cup, but with cookie dough instead of the peanut butter. YUM!
Shop this post
- ProKeeper storage containers set of 6
- Dwellza Kitchen storage containers set of 6
- Mainstays Glass Lock Lid Jars
This post may contain affiliate links. If you purchase a product through one of these links I may earn a small commission.

Edible Cookie Dough Bites
Equipment
- 1 stand mixer with paddle attachment or mixing bowl and wooden spoon
- 1 cookie scoop any size
- 1 baking sheet to place cookie dough bites on while in freezer
- parchment or wax paper to line baking sheet
Ingredients
- ¾ cup packed brown sugar
- ½ cup unsalted butter at room temperature
- 1 tsp vanilla extract
- ½ tsp salt
- 1 cup all purpose or unbleached flour heat treated
- 2 tbsp milk or other milk of choice
- ½ cup mini chocolate chips any variety
I earn a commission from Instacart from qualifying purchases.
Instructions
- Combine brown sugar and room temperature butter and mix until creamy.
- Next, add the vanilla extract and salt to the brown sugar and butter mixture and mix well.
- Then add the *flour and mix until the dough is a slightly crumbly texture.*Heat treating your flour is important to kill any possible germs linked to food borne illnesses. Some commercially sold flour is already heat treated. But if yours isn't, or you're not sure, heat it in the microwave on high for 1 minute. OR bake in the oven on a parchment lined baking sheet at 350 degrees F for approximately 5 minutes until the flour is 160 degrees F.
- Now add the milk and mix until well incorporated.
- Add the chocolate chips and mix together.
- Then using a tablespoon size cookie scoop (or whatever you have/prefer) scoop the dough on a parchment paper or wax paper lined baking sheet in a single layer. Place into the freezer for approximately 20 minutes so that they firm up.
- Now they're ready to eat and/or store in an air tight container in the fridge.
- ENJOY!
Edible cookie dough bites are totally my guilty pleasure and I’m not sorry. I’m going to whip some of these up tonight and store them in the fridge so I can have a treat ready for whenever I want!