

Discover how easy it is to make thick, creamy Greek yogurt at home using the Instant Pot Duo Plus. With just two simple ingredients and a little patience, you can skip the store-bought stuff and enjoy homemade Greek yogurt that’s rich in probiotics, protein-packed, customizable to your taste, and costs a whole lot less. This step-by-step guide walks you through the yogurt function on the Duo Plus, from scalding to straining, so you get perfect results every time!
Recommended Equipment
- Instant Pot Duo Plus
- Candy thermometer
- Large mixing bowl
- Large mesh strainer
- Fine cheesecloth
- A container to store yogurt in the fridge
Ingredients to Make Homemade Greek Yogurt
- 1 gallon milk – whole milk, skim, and 1% all work fine
- Yogurt or yogurt culture (I used one of these yogurt cultures to make my first batch)
Instructions on Making Thick and Creamy Homemade Greek Yogurt
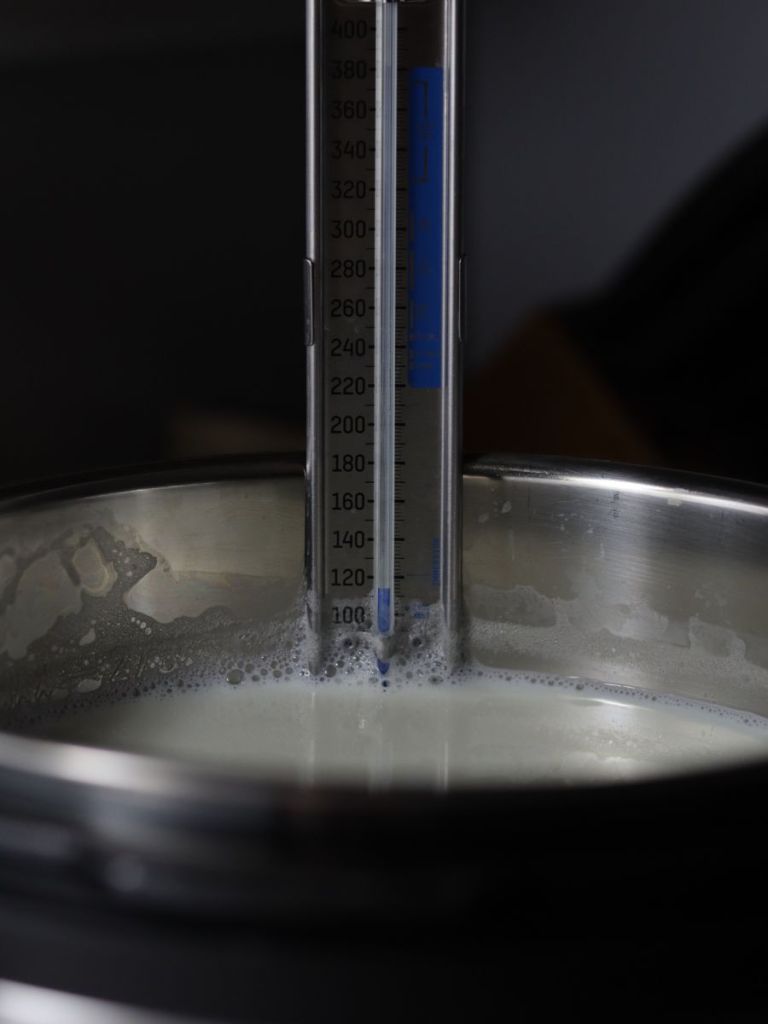
1. In your Instant Pot Duo Plus, add 1 gallon of milk and set it to saute on normal temperature for 20-25 minutes, or until it reaches 180℉. You can do this with the lid on or off, but having it on will help the milk to come up to temperature faster. Check the temperature using a candy thermometer.

2. Once the milk has reached 180℉, remove the pot from your Instant Pot Duo Plus and let it sit until it reaches around 115℉. You can speed up this process by placing the pot into an ice bath.
3. When the milk has cooled to 115℉, add 1/4 cup of yogurt or yogurt starter and mix to combine.
4. Next, put the pot back into the Instant Pot and secure the lid on. Set the Instant Pot Duo Plus to Yogurt, on normal, for 12 hours. I like to do this at nighttime so that it’s cooking while I’m sleeping! See my sample schedule below.
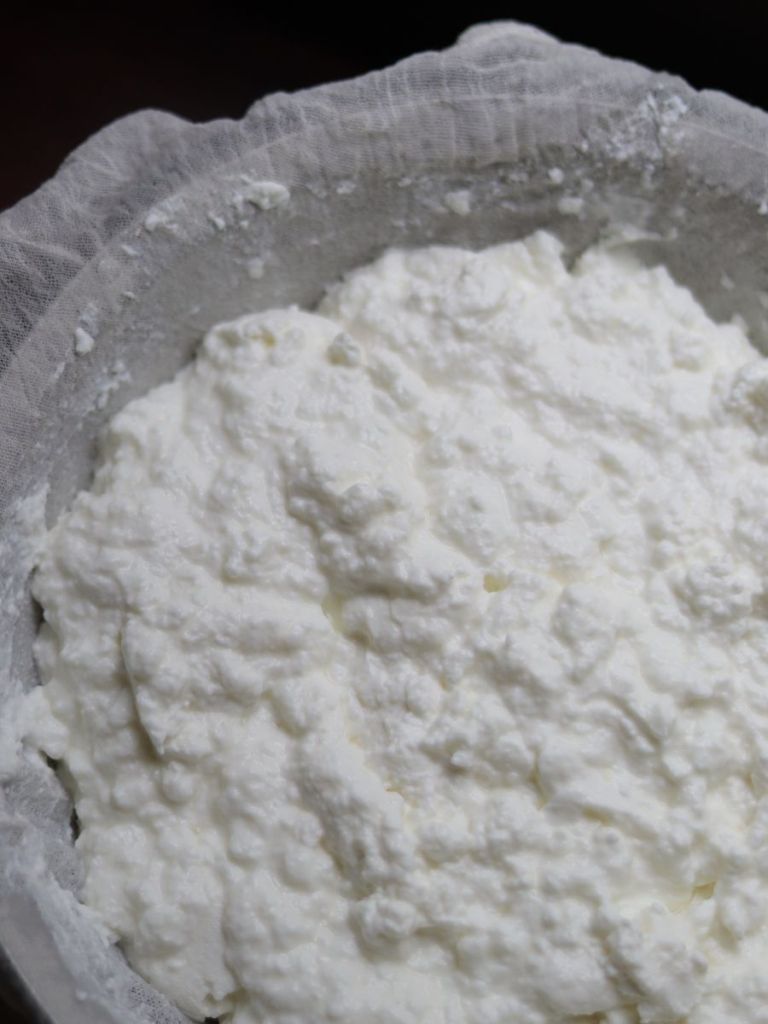
5. Once the yogurt is finished, place the mesh strainer over a large bowl and lay the cheese cloth on top of it. Pour the yogurt onto the cheese cloth and mesh strainer. Do not mix the yogurt before pouring it into the strainer or it will not strain as much of the whey out, and you will end up with a much thinner and runnier yogurt. Allow it to strain for a few hours. The liquid is whey, and it’s packed with protein! The yogurt will start to resemble cottage cheese at this point if you stir it gently with a spoon. See photo below for reference.
6. After most of the whey is strained, pour it into an airtight container/glass and keep it in your fridge or freezer to use in other recipes! As you can see in the photo below, you’ll get a lot of Whey from just one batch.

7. Then pour the yogurt into a mixing bowl and whisk until it is creamy and smooth.
8. At this point, you can add any flavoring you might want, like vanilla. I like to add vanilla and honey for a bit of sweetness. Let it chill in the fridge for a few hours, and then you’re ready to enjoy your thick and creamy homemade Greek yogurt!

Storage Recommendations
Keep your finished yogurt in an airtight container (like this glass Ball Weck jar pictured above) in the fridge for up to one week. Be sure to save 1/4 cup of your homemade Greek yogurt to make your next batch with!
Sample Schedule for Making Homemade Greek Yogurt
At night – heat the milk in the Instant Pot Duo Plus until it reaches 180℉, then let it cool to around 115℉. Add in the yogurt or yogurt starter, mix, and then seal the lid on the Instant Pot Duo Plus and start the 12-hour cooking time for the yogurt.
The next morning – strain the yogurt until it reaches your desired consistency. Flavor it as desired and store it in the fridge.
Common Questions
What kind of milk is best for making Greek yogurt?
This really just comes down to preference. I’ve made homemade Greek yogurt with whole milk, skim milk, and 1% milk. All have worked and tasted fine, but I do prefer whole milk over the others simply because of its thickness. I recommend trying them all and deciding for yourself!
Is it cheaper to make your own Greek yogurt?
Yes! Store bought Greek yogurt can quickly get pricey. It’s much more cost-effective to make your own because just one batch of yogurt made from 1 gallon of milk yields as much as 6-9 cups. Only varied by how uch of the Whey you allow to strain out of it. Never mind the fact that you can save the Whey to use in other recipes!
Do I really need to heat the milk first?
Yes! Heating the milk is what’s going to kill any harmful bacteria that could contaminate the yogurt. It also changes the structure of the proteins and thus allows the milk to thicken.

This post may contain affiliate links. If you purchase a product through one of these links I may earn a small commission.

Thick & Creamy Homemade Greek Yogurt
Equipment
- 1 instant pot duo plus
- 1 Large mixing bowl
- 1 large seive (mesh strainer)
- 1 cheese cloth
- 1 large air-tight container to store yogurt in the fridge
- 1 candy thermoneter
Ingredients
- 1 gallon milk whole, skim, or 1%
- 2 tbsp vanilla exract adjust to your personal taste preference
- ½ cup honey adjust to your personal taste preference
- ¼ cup plain yogurt or yogurt starter
I earn a commission from Instacart from qualifying purchases.
Instructions
- In the instant pot duo plus, add a gallon of milk and set it to "saute" on normal for 20-25 minutes or until it reaches 180℉.1 gallon milk
- Gauge the temperature of the milk using a candy thermometer.
- Once the milk has reached 180℉, turn off the instant pot and allow the milk to cool to 115-120℉. You can do this more quickly by removing the pot from the isntant pot and setting it into an ice bath.
- When the milk has cooled, add 1/4 cup plain yogurt or a yogurt starter and mix well.1/4 cup plain yogurt or yogurt starter
- Add the pot back to the instant pot if you removed it, secure the lid and set it to "yogurt". You can choose the amount of time, but I recommend 8-12 hours for a nice tangy flavor. The longer it sits, the stronger the flavor will be.
- Once the yogurt is done, turn off the instant pot and remove the inner pot from the machine. At this stage, if you slightly tip the pot, the yogurt should behave like one congealed mass, similar to jello. Pour the yogurt over a large mesh strainer covered with cheese cloth into a large bowl. Let the yogurt strain for 2-6 hours. The longer you strain it, the thicker the final consistency will be.
- After having strained the yogurt, you can go ahead and add any flavoring that you'd like. We like a slightly sweetened vanilla flavor.Be sure to reserve 1/4 cup of the plain yogurt to make your next batch with.2 tbsp vanilla exract, 1/2 cup honey
- Store the finished yogurt in an air-tight container in the fridge for up to one week.
This yogurt is so simple to make and the best tasting Greek yogurt I’ve ever had! I love topping it with some granola and fruit, seeds, and honey…it’s so good!